
| Astolfo |
 |

|

|
AstolfoWP (アストルフォWP, Asutorufo?), Class Name Rider of "Black" ("黒"のライダー, "Kuro" no Raidā?), is the Rider-class Servant of Celenike Icecolle Yggdmillennia of the Black Faction in the Great Holy Grail War of Fate/Apocrypha. After the death of Celenike, he forms a contract with Sieg.
He is one of the Servants of Ritsuka Fujimaru of the Grand Order conflicts of Fate/Grand Order. He is a part of Hakuno Kishinami's army in Fate/EXTELLA LINK.
Quick Answers

What is the significance of Astolfo's class name, Rider of 'Black'?

Who does Astolfo form a contract with after the death of Celenike?
What role does Astolfo play in the Grand Order conflicts of Fate/Grand Order?
Profile
Identity

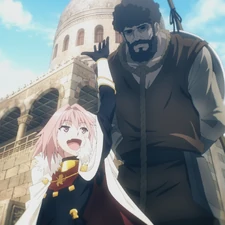
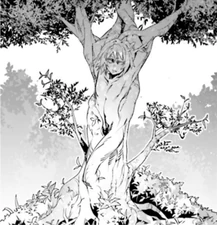

One of the Twelve Paladins of Charlemagne (シャルルマーニュ十二勇士, Sharurumānyu Jūni Yūshi?). In the CharlemagneWP Legend, he is the son of an English king, and one of Charlemagne's twelve faithful PaladinsWP. Among the Twelve Paladins of Charlemagne, Astolfo is said to be the most handsome, eternally optimistic, and completely lacking in sense. As the legends go, Astolfo was quite the ladies' man.[1][7] As a cousin of Roland, Astolfo is included among those twelve—that being said, Astolfo was famed as "weak" in legends.[4]
Astolfo has created many legends as he was an adventurer who flew to all over the world and even reached the Moon in the end. Through his journeys, he had won numerous Mystic Codes such as his flute, his grimoire, and his shining golden lance. Astolfo brought rise to various legends on the back of mounts like a griffin and the famous Rabicano, but particularly famous among them is something inconceivable for this world—the Hippogriff.
Although many are the glorious tales of Astolfo, it is said that he has made just as many mistakes. He was continually defeated in riding tournaments, fell victim to many thaumaturgical traps and even lost—in a matter of hours—the reason that he had picked up at the moon. However, Astolfo never faltered; he did not seem to consider failure or defeat as blunders in the first place.
Appearance
Astolfo is an androgynous-looking boy who is fancily dressed. Beautiful beyond all compare, he states that his hair ornaments, which seem like something a princess would wear, are an "irresistible proof of friendship" that he uses to restore peace to his depressively mad boon ally, Roland.[1] His appearance is contrary to the legend of being said to be the most handsome among the Twelve Peers of Charlemagne, and though extremely unexpected, it is natural for legends to become distorted. He purposefully dresses "as a girl" because he likes cute things.[8]
His armor consists of black underclothes that end in a dress and stockings with greaves, gauntlets, and hip guards with a central red stripe and golden accents on top. He also wears black bows on either side of his head and a cape that's white on the outside and red on the inside with a white fuzzy collar. His long pink hair is tied back into a thick long braid that is longer then his waist.
In Fate/EXTELLA LINK, he has the following costumes:
- Silver Light Armor (白金の軽鎧?): His base armor.
- Memories of Trifas (トゥリファスでの思い出?): Casual clothes consisting out of a pink and white striped crop top with purple edges, a necklace, purple jacket with bunny ears stitched into the hood, a black skirt and stockings, and purple shoes.
- Sparkling Frills (キラキラ・フリフリ?) (DLC): A frilly white and blue swimuit.
- Candy Pink (キャンディー・ピンク?) (DLC): Casual clothes consisting out of a pink baseball cap, a baggy pink shirt with the number 12 flanked by a pair of wings with "brave warriors" written underneath, shorts, and pink sneakers.
- School Uniform Outfit (制服コーデ, Seifuku Kōde?) (DLC) (Joshin Electric/Joshin Online Shopping)
In Fate/Grand Order, his First Ascension lacks the cape, while his Second Ascension is his regular appearance. In his Third Ascension, he wears a little crown and his cape becomes completely red with a black collar. He also has Memories of Trifas as a Spiritron Dress.
 "Rider of Black" in Fate/Apocrypha, illustrated by Ototsugu Konoe.  "Rider of Black" in Fate/complete material IV, illustrated by Ototsugu Konoe.  "Rider of Black" in Capsule Servant.  A-1 PicturesWP character sheet of "Rider of Black" in Fate/Apocrypha.  A-1 PicturesWP character illustration of "Rider of Black" Fate/Apocrypha - Epilogue Event  A-1 PicturesWP Wallpaper Illustration of "Rider of Black" in Fate/Apocrypha.  Rider in Fate/EXTELLA LINK, illustrated by Arco Wada.  Rider's Costume "Memories of Trifas" in Fate/EXTELLA LINK, illustrated by Arco Wada.  Rider's DLC Costume "Sparkling Frills" in Fate/EXTELLA LINK, illustrated by Arco Wada.  Rider's DLC Costume "Candy Pink" in Fate/EXTELLA LINK.  Rider's DLC Costume "School Uniform Outfit" in Fate/EXTELLA LINK. .jpg "Sieg&Astolfo (Comptiq).jpg (686 KB)") Astolfo and Sieg on the Fate/Apocrypha visual from Comptiq November 2017 issue. .jpg "Waver x Astolfo What If pairing (TMAce 10).jpg (754 KB)") Waver Velvet and Astolfo "Master x Servant Alternative" pairing for TYPE-MOON Ace Volume 10, illustrated by Mata.  Astolfo, Jeanne d'Arc, and Mordred on the cover of Fate/Apocrypha Manga Volume 11, illustrated by Akira Ishida.  Rider Stage 1 in Fate/Grand Order, illustrated by Ototsugu Konoe.  Rider Stage 2 in Fate/Grand Order, illustrated by Ototsugu Konoe.  Rider Stage 3 in Fate/Grand Order, illustrated by Ototsugu Konoe.  Rider Stage 4 in Fate/Grand Order, illustrated by Ototsugu Konoe.    Heroic Spirit Exhibition Attire: Astolfo (英霊博装:アストルフォ?) in Fate/Grand Order, illustrated by Ototsugu Konoe. .png "Heroic Spirit Exhibition Attire Astolfo (full portrait).png (1.2 MB)") Heroic Spirit Exhibition Attire: Astolfo (英霊博装:アストルフォ?) full portrait, illustrated by Ototsugu Konoe.     .jpg "Mordred's gang (TMAce 12).jpg (329 KB)")  Rider in Fate/Pixel Wars, illustrated by Riyo.  Rider in Fate/Grail League, illustrated by Riyo.  Astolfo in a kimono from Chaldea Sketch 11 doujinshi, illustrated by Ototsugu Konoe.  Astolfo reading from Chaldea Sketch 11 doujinshi, illustrated by Ototsugu Konoe.  Astolfo in a band from Chaldea Sketch 11 doujinshi, illustrated by Ototsugu Konoe.  Astolfo in a miko outfit from Chaldea Sketch 11 doujinshi, illustrated by Ototsugu Konoe. |
Personality
|
« Oh, I would definitely suggest against leaving it entirely for me to decide. For no man can show as much a lack of restraint as I, Astolfo! » |
| (Astolfo speaking to Sieg) |
Astolfo is known in his legend for being eternally optimistic and completely lacking in sense, and he can be called "curiosity in human form." As a Servant more concerned with the current prospect of a second life over all else, he is one who will, with or without permission from his Master, instantly leave when not in conflict to indulge in the pleasures of the world. He greatly enjoys physical form rather than the usual practice of being kept in spirit form except for battle, and obtaining permission to do so is enough to cause him to dance for joy. He is a frightfully unparalleled blabbermouth, prone to speaking on and on until those involved lose all rationality. His conversations, through no ill intent on his part, have a way of meandering toward maximum social awkwardness. His hobby of adventuring gets himself mixed up in an assorted amount of mischief due to him constantly popping up everywhere.[1] Since he has no wish in special to entrust the Holy Grail, this Servant's motivation greatly fluctuates depending on whether or not he likes his Master. The type who is frankly straight with the person he came to like, regardless of said person being of the opposite or the same sex.[4]
Astolfo leaves all hard decisions as a matter for his heart to decide on the spot, following the course he deems most fit. He does as he pleases without regret, and such obviousness of course would be hard to fathom from anyone other than him. He decides to save Sieg entirely on such a pretense, and not knowing how far he will be able to help, simply states "I'll keep helping him until I stop."
Relationships
- Sieg
- Astolfo took it upon himself to help Sieg when they first met simply because he wanted to. He promised to look after Sieg until he had been wholly satisfied, even after being told that Sieg would live for three years due to being a homunculus. Astolfo would later help Sieg escape from the Yggdmillennia despite knowing the retribution he would receive from the rest of the Black Fact for this treacherous act. He is able to inspire Sieg to continue living even when the latter thought it to be pointless.
- "No waaaaaaaaaaaaaaaaaaaay!?"[9]
- Jeanne d'Arc
- "JK form? Loool hilarious! You wanna go at it alright let's go at it oh I'm strong alright!" (boxing style threat)[9]
- "Oh, is that you, Roland? ROLAND! Ah! It's been a long time! I missed you so much! Huh? Why do you look so disappointed? You were over the moon when a pretty girl started talking to you, only to find out it was me? Hahaha! Stop it... Calling me pretty...! Anyway, I'm glad to see you again. Just don't go streaking through this place anymore, okay?"[6]
- Charlemagne
- "Wh-whoa!? Charlie!? It's really you, Charles! Huh? What did I usually call you back in the day...? Oh well! So you came here! Wait, are you even allowed to come? Oh well! Okay then! Then as your senior, I'll teach you everything about Chaldea! This here's Master! And...this here's my Master! Anyway, it's good to have you around, Emperor!"[6]
- Minamoto-no-Tametomo
- "Oh, hey! You're the robot I fought in Traum! Whoa, when I look at you up close, you really ARE a robot... (Pat, pat, pat) Huh. It's really steel. But why a robot? Were you always a robot? Wow...that's amazing... Hey wait a minute. I think I met another giant robot in a different world earlier... Oh well! Anyway, let's work together this time around!"[6]
Role
Fate/Apocrypha


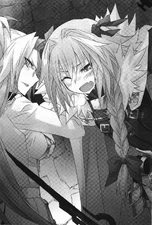


Rider is summoned by Celenike Icecolle Yggdmillennia with a glass bottle containing stains left by some kind of liquid as a catalyst in a multiple Servant summoning. When first summoned, he is the only one to show a wide, smiling face at the Masters. He is quick to introduce himself to the other Servants, forgetting all tact in instantly revealing his name without permission and subsequently being rebuked for using Archer's true name rather than his class name. After the gathered Masters and Servants begin to leave, he is extremely pleased when his Master offers to give him a tour of the castle. She reveals that she will not force him to go into spirit form to conserve energy and even prepare him a room. Upon leaving for the town despite his Master's strict control, he uses a plain outfit designed for the homunculi to keep from drawing attention.
Soon after Kairi Sisigou and Saber of Red fight several of Caster of Black's golems, a homunculus escapes from the magical energy storage tanks before he can be used as research material. As the homunculus desperately tries to escape, Rider comes upon him, concerned about his state and determined to help him in some manner. As the homunculus inaudibly murmurs for help and faints from exhaustion, Rider begins by wrapping the homunculus in his cloak and carrying him to safety. Rider avoids his own room due to his Master calling on him constantly, and he runs into two homunculi searching for the escapee on Caster's orders. Rider denies having seen him, and he contemplates on who he could confide in about the situation. Discounting Saber, Lancer, and Berserker, he decides upon Archer. As Archer picks up on the circumstances instantly, he uses his medical knowledge to examine the homunculus.
Archer informs Rider that the homunculus cannot live a normal life, giving him three years to live at most in his state. Rider becomes depressed at the news, and Archer inquires as to why he saved the homunculus. He is able to answer instantly that it was simply because it was what he wished to do, and he leaves the question as to what do about Caster pursing the homunculus up in the air. Archer loans him the room for the time being, and before leaving, asks Rider if he will see the task of caring for the homunculus until the end. Noting how weak and helpless the homunculus appears, he cannot believe he would be able to escape on his own or survive even if he did escape. Although Rider will disappear far before three years, he plans on protecting and helping the homunculus until he feels it is acceptable.
He nudges the already awake homunculus up, and attempts to start a conversation that is only met by a timid silence. In an attempt to calm him, he gently hugs the homunculus to his chest while telling him that he is there to help him obtain his wish. As the homunculus comes to ask for Rider to save him, Rider answers instantly, responding to the doubting look of the homunculus with a carefree smile. Rider promises to save him no matter the obstacle as a Heroic Spirit, telling him to leave all planning to he who lacks restrain more than anyone else.
Side of Survivor
After the conclusion of the Great Holy Grail War, Rider stays summoned in the world as his contract with Sieg was never terminated. He begins to travel the world and meets up with the other survivors of the war to catch up on what they've been doing, such as reuniting with Fiore Forvedge Yggdmillennia at her new home in New York. He intends to keep a permanent record of events due to his poor memory. Following his interviews with the other survivors of the War, he makes a journey to the Middle East to investigate how Amakusa Shirou obtained Semiramis’ catalyst.[10]
Fate/Grand Order
Subspecies Singularity II: Agartha
With Jingle Abel Meuniere‘s help, Astolfo and Chevalier d’Eon secretly rayshift with Ritsuka to the Agartha Singularity. He abruptly reveals himself while Ritsuka is busy talking with Mash and Leonardo da Vinci about the Servants missing from Chaldea. After Ritsuka gives their observational analysis of the environment to Leonardo da Vinci, D’eon says they should search for the Demon God, but Mash says its signal became muddled after Ritsuka arrived. Da Vinci detects artificial structures nearby, so the group prepare to investigate. Astolfo runs ahead of the others, but he quickly comes back, having accidentally brought back a pack of Demon Boars. After slaying the boars, the group follows their tracks to find a boy on the ground. He introduces himself as Fergus.[11] He manifested as a child though, with even his memories being those of his childhood.[12]
The group discovers a nearby campsite, where they’re beset by Amazons when they notice Fergus. After they’re defeated, Astolfo assigns Fergus to be Ritsuka’s full-time protector, noticing he’s perfectly fine when it comes to defense. He assures him he’ll eventually get used to fighting females. D’Eon notices wagon tracks leading away from the camp and down the road. The group then follows them to see where they go.[12]
The group arrive in a town where they see the Amazons are keeping men as slaves. This makes everyone realize why the Amazons attacked them at the hunting outpost when they saw Fergus. D’Eon suggests they leave before anyone notices when they’re discovered. After the group defeat the Amazons, Penthesilea appears to see about the commotion. After learning Ritsuka’s name, she asks them who sent them and where they’re from, list every faction in Agartha. Ritsuka’s confusion at the question is mistaken by her as a refusal to answer her. She then attacks the group joined by her Amazons. She commends them for their bravery and prowess with exception of Fergus, who refused to defend himself. The group tries to retreat when Penthesilea decides to take them as slaves, but they’re outnumbered with more Amazons arriving. However, half of the Amazons go with Penthesilea when she leaves for a nearby town after hearing a certain man is there. The group fight off the other half’s attempt to capture them until Christopher Columbus and his Resistance arrive to help. After the Amazons are defeated, the Resistance free the enslaved men. Columbus reveals Agartha is under an oppressive matriarchy, and claims the Resistance fights against it. He agrees to answer any questions at the Resistance’s hideout. He confirms he is a Rider class Servant, but he cannot use his Noble Phantasm due to his amnesia.[13]
Arriving in the Resistance’s hideout, the group learns Agartha is inescapable. They also learn the Resistance members were taken from different eras after a hole acting as a teleportation spell to Agartha appeared beneath them. A boy then alerts them to a monster attack. After the monsters are slain, Columbus explains the current state of affairs in Agartha. Da Vinci suggests the Demon God assimilated with one of the ruling Servants that serve as the Singularity’s core. The group join with the Resistance since their goals align. They then help slay monsters attacking the peach trees, which serve as the Resistances’ food supply. Afterwards, they try to rest while Mash and da Vinci are analyzing the new information. Afterwards, Columbus decides they’ll first attack the City of Water, Ys, especially given that there is Resistance camp on the edge of the city’s territory for resupplying purposes.[14]
As the group head for the camp, Columbus explains all of Agartha’s rivers flow into the lake where Ys is located. The people of Ys sail these rivers to attack and plunder their enemies. The Resistance is targeting Ys to stop these attacks and take control of the rivers. Eventually, the group reaches the camp to find it under attack by pirates. After killing the pirates, Columbus has the survivors and relief group take care of the camp. Meanwhile, the group will sneak into Ys and kill the Pirate Princess.[15]
After sneaking into Ys, the group finds it to be both filthy and violent. Columbus suggests stealing a gondola since the canals are the quickest way to the Pirate Princess. D’Eon disagrees since it would draw too much attention, so it should be used as a last resort. The group eventually notice pirates abusing men at a tavern. They defeat the pirates, but a previously absent one alerts the city before Columbus knocked her out. The group run to find somewhere to hide when D’Eon notices they’re near the city’s largest mansion. Wu Zetian offers to show them a secret path into the mansion. They follow her through her secret path, eventually reaching the mansion’s rear garden. After Wu Zetian is gone, the group enter the mansion.[16]
Inside the mansion, the group is met by Francis Drake, one of the Servants missing from Chaldea, albeit with different clothes and mannerisms. Da Vinci confirms her Spirit Origin is that of Drake’s. “Drake“ denies it however and introduces herself as the Pirate Princess Dahut. The group realize Dahut isn't the Drake they knew, and fight her and her pirates. However, after they killed a few pirates, Dahut orders her pirates to produce more. After more pirates are produced, the group fight once again. Dahut loses, and she tries to escape. Pirates are produced to stop the group from giving chase when everything shakes. The city’s floodgates have been opened, and Ys is now being flooded. Wu Zetian then appears; Dahut identifies her as the Empress of the Nightless City. Wu Zetian reveals she was the one who opened the city’s floodgates, knowing the key’s location from Dahut’s previous confidant. The floodwater then washes Dahut away. Wu Zeitan invites the group to her city if they escape before escaping herself.[16]
Escaping the flooding mansion, the group see Ys is almost completely flooded. Mash and Da Vinci confirm Dahut wasn't the Demon God host since she didn't follow the previous patterns of becoming a Demon God when on the brink of defeat. Still needing to find the Demon God, the group go to the Nightless City.[16]
Travelling to the Nightless City, Columbus reveals he ordered the Resistance to find any seaworthy vessel among Ys’ ruins. He also says there is something akin to a natural disaster outside the threat of the ruling Servants and monsters. He describes the Nightless City as being reserved and defensive compared to the Amazons and pirates. With Ys gone, Columbus suspects there are changes in the Nightless City, and suggests doing recon. He also warns the city is home to monsters he refers as dogs.[17]
As the group near the Nightless City, Columbus returns to the Resistance’s hideout, so he can return with a proper force ready to take city after Wu Zeitan is defeated. After the group infiltrates the city, D’Eon decides to take measures to ensure the operation remains covert by first gathering information with a small group. Once they gain information on the city, its threats, and Wu Zetian’s location, the group will move in together. D’Eon then decides they and Astolfo will gather the info since they can pass as citizens. They then grab outfits from a nearby house to use as disguises. Astolfo implies the outfits are used for sexual roleplaying, given that D’Eon grabbed from a bedroom. D’Eon reminds the others to keep a low profile before leaving with Astolfo.[18]
While doing reconnaissance, the pair notice a platform in the plaza’s center. They also notice the men aren’t physically restrained; D’Eon guesses they’re bound by a spell instead. Therefore, they decide to ask a man about it once he’s alone. They then notice a woman accompanied by two men, so they follow them with Astolfo. While the woman leaves the men to go to the bathroom, one man tells the other about how he wants to flee the city and join the Resistance. D’Eon tries to go talk to the men when the other man loudly reports the other is disturbing the peace by trying to flee the city.[18]
At the center of the plaza, the pair witness a Torturer (the city’s police force) carryout the public execution of the man who tried to flee by Langchi. D’Eon immediately realizes the platform is a scaffold meant for executions. Astolfo encourages them to stop the execution. The Torturer is tougher than she looks, though with more incoming. The Torturer demands to know the pair’s identities before she executes them following the man. Astolfo introduces himself as Sailor Paladin followed by D’Eon introducing themselves as Maid Knight to their embarrassment. Ritsuka and Fergus then arrive to help them. After defeating the Torturers, the group flees while Mash searches for a hiding place. They eventually escape their pursuers, and D’Eon and Astolfo return to their regular outfits.[18]
A man (who Ritsuka and Fergus met earlier) thanks the group for saving the man who was about to be executed, even though he won’t last the night with a severed hand. Considering the city’s tight security, and not wanting to keep the Resistance waiting, the group decided they need to take down Wu Zetian today. D’Eon asks the man where Wu Zetian is, but he cannot answer since the men are only slaves to the women.. Ritsuka asks him if he heard any rumors that may lead to Wu Zetian. He recalls one about an underground facility in the city that only Torturers or higher may enter. D’Eon asks for its location, to which the man recalls another telling him about how a Torturer appeared out of nowhere before him. He assumes the facility’s entrance is near where that occurred, the executioner’s scaffold in the plaza.[18]
The group return to the plaza to search for the facility’s entrance. Unfortunately, they accidentally activate a trap and become surrounded by Torturers. The man had sold them out for his own survival. Wu Zeitan agrees to reward him, but not before torturing him. She then invites the group to her palace, revealing it and the underground facility are the same when she raises an extremely bright castle from beneath the scaffold, calling it Yaoguang Hall. The Torturers then emerge from the castle’s entrance with more behind the group to prevent their escape. Fighting their way through, the group enters the castle.[18]
Entering her throne room, the group finds Wu Zeitain and her tactician, Scheherazade. Wu Zetian reveals it was Scheherazade’s plan to flood Ys. Scheherazade confirms she was once Dahut’s confidant, but fled to serve Wu Zeitain when she feared for her life. Wu Zeitan then asks the group’s opinion on her city. They criticize it for its lack of basic human rights for men, and its justice system that encourages men to betray one another to survive. Wu Zetian decides to punish them personally for their criticism with the help of her Torturers and Scheherazade. She tries to convince the group to be her subjects, but they refuse since Nightless City is rotten as Ys. They defeat her, but she refuses to give up when Megalos crashes through the ceiling and crushes her. Scheherazade warns against fighting him since a single strike from Megalos will kill them. She surrenders and escapes the castle with the group.[18]
They find the city being besieged by Amazons. Columbus and the Resistance then arrive to help them escape the city through the front gate. Waiting there, though, is Penthesilea while Megalos is exiting the castle. However, to the group’s confusion, she rushes past them and goes into the castle while in a rage. Using this opportunity, the group escape the city while Penthesilea and Megalos fight.[18]
Returning to the hideout, the group learn from Columbus that the Amazons now control what’s left of the Nightless City following Megalos’ rampage. Scheherazade offers her services, explaining her betrayal and abandonment of Dahut and Wu Zetian were for her survival. She reveals her True Name, and the group accepts her into their fold. She then warns them of Lamia attacking the peach trees and helps slay them. Afterwards, the group ponder the possibility of Megalos of being the Demon God host. Columbus convinces them, however, that Penthesilea is a better candidate since she is the remaining ruler in Agartha and completely adherent to its oppressive matriarchy. It is then decided that the Resistance will invade El Dorado next.[19]
Following Scheherazade’s advice, the group and the Resistance travel through the jungle to infiltrate El Dorado since its forces should be split between it and the Nightless City. After killing an Amazon scouting party, the group finds themselves surrounded by more. They attempt to fight them, but they’re forced to retreat when the Amazons empower themselves with their synchronized warcry.[20]
Back at the hideout, everyone sees they lost half of their forces. Seeing how terrified the men are, Columbus tells everyone to rest. The next morning, Astolfo wakes up Ritsuka to alert them that the grove is on fire. The group help the Resistance try to save their remaining supplies and tend to the injured. After the fire dies out, Columbus encourages the men to continue fighting. Scheherazade advises they launch another sneak attack, but this time using a ship taken from Ys.[21]
Astolfo pilots the ship through the jungle toward El Dorado when he comes across a bridge acting as a barrier. Columbus orders him to sail on through while the others deal with the Amazons. Breaking through two barriers, the group spot the central temple of El Dorado. Columbus orders them to set anchor on the shore nearest to the temple when the ship shakes. Megalos emerges from the river and boards the ship. The group tries to fight him, but they’re unable to even scratch him. But having regained his memories, Columbus activates his Noble Phantasm, Santa Maria - Drop Anchor to summon another ship to hold Megalos, revealing his True Name. Taking advantage of him being chained up, the group fight Megalos again. They prepare to finish him off when Penthesilea and her Amazons board the ship. She attacks Megalos, calling him Achilles to the group’s confusion. Da Vinci deduces her True Name. Penthesilea decides to kill the group, believing they’re keeping her from killing Megalos. At the same time Megalos breaks free of Columbus’s chains, so the group is forced to fight both Berserkers. The ship is destroyed in the aftermath, sending everyone overboard.[21]
The group arrives in the Dragon Palace. Astolfo has Ritsuka rest on his lap until they wake up. He and D’Eon explain to them what happened. Megalos is also there, albeit in a deactivated state. Ritsuka is convinced to explore since communication with Chaldea was cut when they arrived at the Dragon Palace. A still living Dahut appears however. Astolfo assumes she drifted to the Dragon Palace, but she reveals it is her last bastion in case of Ys’ destruction. She attacks the group to take them for herself. When they defeat her, Dahut’s memories and mannerisms revert to that of Drake’s. She gives them a treasure box she found earlier and used in the battle. She tells them to explore the Dragon Palace to find more before disappearing. Scheherazade surmises the treasure box to be the Tamatebako from the tale of Urashima Tarou, which grants single wishes more akin to a Command Spell. Astolfo wonders if they can use it to power the Noble Phantasm they usually can’t use. If it works, they could use Noble Phantasms they avoid using to not drain Ritsuka’s magical energy. Columbus has Scheherazade use the Tamatebako to have Megalos follow his commands. Afterwards, Astolfo finds a lifeboat in a bubble. The group decides to find and collect more Tamatebako before returning to the surface.[22]
Once the group return to the surface, communications with Chaldea are restored. After explaining what happened, they enter Penthesilea’s palace in El Dorado. In her madness, Penthesilea sees everyone as Achilles, and uses the synchronized war cry. Astolfo and D’Eon leave to hold back the Amazons while the others stay behind. D’Eon explains to Astolfo that they need hold off the Amazons or the others won’t be able to defeat Penthesilea, even with Megalos' help. Astolfo is embarrassed to hear he served as the exemplar for all french knights including D’Eon. The pair then use the Tamatebako to allow the use of their secret Noble Phantasms. Astolfo uses La Black Luna to neutralize the war cry, and D’Eon uses Fleur de Lys in preparation for their fight. Their defeat of the Amazons allows the others to defeat Penthesilea. It is also revealed that Da Vinci convinced them to not trust Columbus after learning his True Name.[23]
The pair return just in time to save the others from Megalos under Columbus’ command. Columbus admits he set the fire in order to spur the men into continue fighting, revealing they’re his pawns to conquer Agartha. The group then fight and defeats him and Megalos. Columbus tries to use a Tamatebako to heal Megalos, but a Resistance member shoots it out his hand. Fergus then deals a fatal blow to him, expecting a Demon God to emerge. However, both Columbus and Megalos disappear without a Demon God emerging. As to answer the group’s confusion, Sherlock Holmes asks them who was the one surviving Servant they met in Agartha that has absolutely no connection to Chaldea. Everyone then realizes that it is Scheherazade. She reveals Agartha is a story brought into reality by her Noble Phantasm, Alf Layla wa-Layla. Heroic Spirits from Chaldea and elsewhere were summoned to Agartha as twisted and inauthentic versions of themselves for her and her Demon God summoner’s plan to destroy the world and end her existence as a Heroic Spirit. The Demon God also empowered Scheherazade's Noble Phantasms to make her stories real. Scheherazade declares the story of Agartha will soon become its true form, then Agartha raises in the sky.[24]
As Agartha continues raising, Scheherazade declares it is its final form, the floating city of Laputa. To stop the men from panicking, Astolfo orders them to rescue the men still enslaved in El Dorado. Once they’re done, they are to rendezvous where the boats are. After the men leave, Scheherazade explains she'll have Laputa destroy a heavily populated city to force people to accept a fictional city as reality to eventually render all things related to Mystery obsolete. Astolfo finds that would be unfortunate since he’d never get to visit any new places or meet new people ever again. Disagreeing with her plan to bring an end to Mystery just so she can avoid death, the group fight Scheherazade to stop her plan. Only D’Eon is effective though since Scheherazade’s Counter King skill renders Astolfo and Fergus’s efforts worthless. Scheherazade then reveals she summoned Columbus in compliance with the Demon God's command to incite conflict between the Servants, and explains the purpose of said conflict. She then releases the Demon God Phenex from her body. Phenex couldn’t be previously detected because he was already dead thanks to his unique ability as the Demon God of death and rebirth. The group fight and kill him, though at the cost of Fergus being severely injured.[25]
However, even with Phenex’s death, and Scheherazade near death, Laputa continues to exist. Eventually Phenex resurrects himself through the corpse of a Resistance member. He declares Laputa will continue its descent even if he’s killed. He reveals his true ambition is to damage human understanding in the hopes of it would eventually result in humanity’s destruction. The group him again, but they’re unable to kill him. Wu Zetian reveals her survival, saying she was biding her time until Phenex separated from Scheherazade. She then tortures him with her Noble Phantasm, Manual of Accusation, but he severely wounds her in retaliation. She pleads with the group to kill Phenex while he’s in a state of life and death. However, to the others’ surprise, Fergus walks into Wu Zetian’s Noble Phantasm to use its concept of mixing life and death together to essentially resummon himself through the use of Columbus’s Tamatebako. He soon achieves his goal when his short sword turns into Caladbolg and unleashes Caledfwlch Caladbolg on both Phenex and Laputa. With Phenex being constantly damaged by both Noble Phantasms, the group fight him once more. Afterward, Phenex extends tiny tentacles from himself, and implores Scheherazade to give him her magical energy. She however refuses to die by him, and Fergus finishes him off.[25]
Wu Zetian, Fergus, and Scheherazade soon disappear. Astolfo initially commends Fergus for their victory until the Laputa starts collapsing. He voices his frustration at Fergus for leaving since he was responsible for destroying Laputa. D'Eon reminds him the men are still at the boat waiting for rescue. Astolfo decides to fly around on Hippogriff to search for and retrieve any stragglers left in Agartha. He sets off when he bumps into Helena Blavatsky's UFO. With her help all the men are rescued while Ritsuka and D'Eon ride on Hippogriff with Astolfo.[25]
Realm of the Thanatos Impulse: Traum
Santa Alter for Roughly a Week
Confronting Santa Alter on Hippogriff when she came in response to Marie Antoinette's letter, Astolfo tells Marie to fire at her. Later, he lands too late to join Marie and Chevalier d'Eon in their fight against Santa Alter. After Marie and D’Eon retrieve their present, Astolfo is eager to retrieve his present. But Santa Alter flies off, refusing to give him one since he didn’t help out at Orleans. Astolfo attempts to excuse his absence when he is hit by a Halloween pumpkin thrown by Santa Alter. He wonders if she is calling him cute by giving him a pumpkin, but Marie teases him that it means that he won’t reappear until next year’s Halloween.[26]
Amakusa Shirou Trial Quest
Astolfo meets Ritsuka and Mash in the ruins of a town, showing himself by jumping out and startling Mash. After introducing himself, he recalls why he called out to the two. He then tells them that Amakusa Shirou and Gilgamesh are waging a Holy Grail War. After slaying some lamia, Astolfo guides Ritsuka and Mash to where Gilgamesh and Amakusa Shirou are.
There Astolfo interrupts a fight between Amakusa Shirou and Gilgamesh, announcing he brought a Master with him. Amakusa Shirou and Gilgamesh realize Ritsuka can choose who gets the Pseudo-Grail once they know their reasons for wanting it. Astolfo isn't interested in the Grail, so this competition is just between Amakusa Shirou and Gilgamesh. After the two give their reasons for wanting the Pseudo-Grail, Romani Archaman reveals it is growing and consuming magical energy. Because of this, the Psuedo-Grail is at risk of becoming a real one. Romani, therefore, feels it'd be dangerous for Ritsuka to give the Grail to a Servant they're not contracted with. Ritsuka decides they'll take the Grail themselves, prompting a fight between the group and Amakusa Shirou and Gilgamesh.
After the battle, however, Romani reports the Psuedo-Grail is summoning Shadow Servants. For this reason, Amakusa Shirou and Gilgamesh realize the Psuedo-Grail is now too dangerous to be used and needs to be destroyed.
Entering the Psuedo-Grail's chamber, everyone splits into teams of two to combat the Shadow Servants. Astolfo goes with Gilgamesh, while Amakusa Shirou goes with Ritsuka and Mash. After destroying the Shadow Servants, the group prepares to destroy the Psuedo-Grail. But a massive ghost with magical energy equal to a Demon God emerges from it. After the others destroy the ghost, Gilgamesh destroys the Psuedo-Grail. Afterward, Astolfo says goodbye to Ritsuka and disappears.
Event: Inheritance of Glory
Following the conclusion of the Great Holy Grail War, Darnic Prestone Yggdmillennia, still fused with Vlad III, remained in the Greater Grail. Stilling wishing to acquire the Grail, he manifested mindless replicas of the war’s participating Servants (except the Rulers) to fight endlessly in a recreation of the war inside a recreation of Trifas.[27][28]
Astolfo, Mordred, and Siegfried attack Yggdmillenia Fortress, where Ritsuka’s party is based, at night.[29] They are defeated by the group and disappear with the morning light. Due to Sieg's influence, they all rematerialize with a sense of self the following morning. During a meeting in the gardens, it is determined that the Hanging Gardens of Babylon is the enemy base. While agreeing with a direct assault, Chiron warns their chances of success will be low since twelve Servants will be guarding the Gardens. Avicebron advises against attacking the Gardens during the day like Atalanta proposed, as a flying golem he sent there on Chiron’s order was forcibly transported outside when night arrived. Chiron asks Sieg if he can move his main body, Fafnir, now. Sieg answers he can fly at a minimum but warns he’ll fall if hit by a Noble Phantasm, especially Balmung. Achilles and Astolfo, therefore, decide to fly alongside him to back him up. Astolfo has Siegfried ride Hippogriff with him. Chiron then trains them and Mordred in teamwork, using Avicebron's golems.[30] The next day, before the assault, everyone eats strawberry sandwiches in the gardens.[31]
Later that night, the group flies towards the Gardens. They eventually break through the enemy and enter the Gardens.[31] Inside they defeat Semiramis and Karna, who rematerializes with a sense of will come morning. They are then guided by Semiramis to where the enemy resides, the Grail’s chamber.[27]
At the Grail’s chamber, the group meets Darnic Prestone Yggdmillennia, the mastermind behind the recreated Great Grail War. Sieg explains who and what Darnic is. He tries to convince him to surrender, saying a broken Grail cannot reach the Root nor activate the Third Magic. Darnic refuses and reminds the group that he already controls 87% of the Grail. He declares that as long as he possesses the Grail, none of them will ever disappear, but they will once he’s gone. He then proposes using the Grail to incarnate them if they agree to join him. But they all refuse his proposal on their own principles as heroes. Expecting that to be their answer, Darnic connects to a replica of the Grail that emerges from within the Grail to Sieg’s shock. He then fights the group by having the replica Grail continually spawn replica Servants.[27] The group struggle at first since the replica Grail is using their class affinities against them, so they decide to do the same.[32]
After the replica Grail is destroyed, Darnic refuses to give up when he’s struck by Kazikli Bey from the supposedly sealed Vlad III. Unlike the others though, he retained his memories of the Great Grail War due to Darnic fusing with him during it. He eventually convinces Darnic to accept that his broken dream can never be recovered. After Darnic and Vlad disappear, Semiramis teleports the group back to the ground.[33]
On the ground, Astolfo asks Sieg why he's been avoiding him. Sieg eventually answers that it's awkward to meet someone you've said already goodbye to, even if they don't remember. Astolfo asks if the "him" Sieg knew was still him. Sieg affirms that he was and states how proud he was to have Astolfo as his Servant. Astolfo thanks Sieg and disappears.[33]
Summer Event: Servant Summer Festival!
Astolfo and D’Eon both go to an amnesiac Gilgamesh looking for a job. Gilgamesh immediately identifies Astolfo as a troublemaker and only hires D’Eon.
While looking for the owner of the printer, Ritsuka’s party notices Astolfo skipping down the street, so Jeanne Alter asks him where the owner is. He doesn’t know, but he recalls a big-shot that is likely a company owner. He says he is at the Shelton during this time and its owner. A little later, he goes to the hotel himself in response to their job posting for a porter. But to his dismay, Mordred immediately rejects him.
In the final loop, Edmond Dantès arranges for Astolfo and Sakata Kintoki to give Ritsuka’s party a ride to the convention center when Medb’s men show up to prevent the group from getting their final draft to the printer before the convention starts. While Ushiwakamaru goes with Kintoki, Ritsuka and Jeanne Alter go with Astolfo. They’re shot out of the air, however, by Medb’s chariot. Astolfo, Ibaraki-douji, and Cú Chulainn hold it off, while Ritsuka and Jeanne Alter rush for the convention center.
Christmas Event: Holy Samba Night
Astolfo is Santa Alter’s partner in the Santa Tag Team Tournament on behalf of England. Santa Alter picked him because he said he has a royal English bloodline and because Hippogriff can pull her sleigh. They are Quetzalcoatl and Bradamante’s first match. Seeing his cousin with Ritsuka, Astolfo thinks Bradamante is no longer searching for Ruggiero. Bradamante angrily corrects him and asserts she knows Ritsuka isn’t Ruggiero’s reincarnation when Astolfo thinks Bradamante thinks they are. She explains she is only with Ritsuka to repay her debt to them for saving her. The match then starts, during which Bradamante notices Astolfo’s Hippogriff is hers. After losing, Astolfo tells his cousin she can’t have Hippogriff as they’re his Noble Phantasm now. Bradamante reluctantly accepts and asks Astolfo to take care of them. Astolfo and Santa Alter later watch the livestream of the finals.
Interlude
While Waiting for Roland
Astolfo forces Ritsuka to accompany him to the Orleans Singularity under the assumption that Roland would eventually be summoned if they just wander around looking for him. While spending some time being lost and carefree about it, Astolfo tells Ritsuka and Mash (who is serving as navigator) a little more about his cousin after denying that they are romantically involved, specifically about how Roland came to enjoy stripping and running around naked.
Eventually, they come across a castle, where Astolfo questions one of the soldiers about whether they had seen a "naked handsome man". Evidently traumatised by Roland's naked rampage, the castle's soldiers attack under the belief that they are Roland's friends. After subduing them, Astolfo and Ritsuka move on to a town where the process repeats itself, with the town's citizens being so appalled that they appear zombie-like.
They track Roland to the wastelands, and Astolfo manages to successfully locate him with his detailed if illogical reasoning. Thankfully, Roland appears to them clothed, and seems reasonable enough until he is introduced to Mash. When she rejects his advances, Roland descends into a rampage yet again and loses his form, revealing that he is actually a figment of Roland's emotions that were left in France rather than the real deal. The figment laments that it wanted to "bare it all" upon defeat, causing Astolfo to burst into laughter and proudly acknowledge that he would like to fight again with Roland and their king, Charlemagne.
Fate/EXTELLA LINK
Other appearances

In TYPE-MOON's April Fools' Day 2015, Astolfo is an artist in the Imperial Roma talent agency. He debuted in the December 30, 2012. His class is Male girlWP Idol (男の娘アイドル, Otokonoko Aidoru?) and he is from England. His Twitter user account is @tmtt15_astolfo.
Non in-universe appearances


Abilities
Although Astolfo was one of Charlemagne's Twelve Paladins, he is a “weak” knight whose abilities are inferior to the rest of them,[7] and he has been famed as such in multiple legends.[4] Despite Astolfo himself being certainly weak, the many Noble Phantasms he received (or borrowed) in the middle of his adventures are extremely powerful, so he can be fully counted as a war asset.[4] If his Noble Phantasms weren't taken into account, Astolfo would be considered somewhere between second and third rate as a Heroic Spirit in terms of strength and skill.[34]
Astolfo boasts high luck which is not just for show; most of the time, what Astolfo does ends up going smoothly.[3] Unlike many other Servants, he is a Heroic Spirit whose True Name does not bring about any inherent weaknesses if it is exposed.[35]
Astolfo's main weapons are a sword and chain mail. He has a slender sword hanging along his waist, though it is not a Noble Phantasm, its sharpness was incomparable with commonplace weapons held by other rank-and-file soldiers. However, he doesn't use his sword much so he gave the sword to Sieg. To Sieg, the steel blade felt heavy in his hands.
Skills
Class Skills
- Magic Resistance (A (D) Rank): Astolfo would naturally have this skill at Rank D, however, thanks to his book Noble Phantasm, its rank has been greatly increased. Due to this, all magecraft at Rank A or below is canceled. As a matter of fact, modern magi are incapable of hurting Astolfo.[2][3]
- Riding (A+ Rank): Astolfo possesses the ability for riding. As such, he is capable of managing even beast with the rank of Phantasmal Beast and Divine Beast. However, this doesn't apply to Dragon kin.[2][3]
Personal Skills
- Evaporation of Reason (D→D+ Rank): Reasoning is disappearing. It is impossible for him to keep secrets. He'll carelessly chatter about his team's weaknesses and True Names, forgetful of important things, etc. A kind of extreme curse. This skill also serves as "Instinct." During the battle Astolfo is able to, to some extent, feel the optimal course.[2][3]
- Monstrous Strength (C- Rank): Temporarily magnifies STR. However, during the usage of this Skill, Astolfo receives damage every turn.[2][3]
- Independent Action (B Rank): The ability to act independently for a period even if magic energy supply from the Master is severed. At this rank, even if he loses his Master he is able to stay manifested for a period of 2 days.[2][3]
Noble Phantasms
- La Black Luna: A hunting horn that strikes fear into the hearts of all who hear its sound, prompting instinctive escape.[1] Those within its range will be struck with the shock of an explosive sound. In the case where the damage is the same or higher than the target's HP, they will be turned to dust and scattered around.[2][3] Does not affect Heroic Spirits with Magic Resistance, but normal mages are not immune to its influence.[1]
- Casseur de Logistille: Inherited from a certain witch, it is a book with the means to shatter any and all magic recorded within it. It does not cancel a Reality Marble or a greater magecraft exceedingly close to Reality Marbles to such an extent, but evoking its true name and reading its content makes it a possibility...[2][3]
- Trap of Argalia: Lance of the knight, Argilia. Has a golden tip. Killing ability is low although a wound is inflicted to the leg of the spiritual body. To come back from falling, a LUCK check is necessary. In the case of a failure the bad status "falling" continues to linger. However because LUCK re-adjusts itself upwards, it's not hard to succeed.[2]
- Hippogriff: A Phantasmal Beast that's essentially an "impossible" existence. Although its rank is inferior to a Griffon from the Age of Gods, its charging pulverization attack is equal to an A rank physical attack. For only a moment, it is able to place itself in an inter-dimensional rift. Therefore, it is able to phase through every single attack.[2][3]
- In Fate/Apocrypha, Astolfo received the divine shield Akhilleus Kosmos from Achilles. However, due to not being the true owner, Astolfo cannot use Achilles' method of attack with the shield.
Development
Creation and Conception


Astolfo was created by Meteo Hoshizora and designed by Ototsugu Konoe for the original canceled online game project.[1][3]
Astolfo was designed by Ototsugu Konoe in Fate/Grand Order.
Yuuichirou Higashide said how scary it was that he ended up no longer knowing what his gender is while he's writing Fate/Apocrypha.[8]
Reception
Konoe said he became a wonderful character who follows his own path in a refreshing way while ignoring the established framework.[8]
- In the Type-Moon's 10th Anniversary Character Poll, Astolfo was ranked 152nd.
References
- ↑ Jump up to: 1.00 1.01 1.02 1.03 1.04 1.05 1.06 1.07 1.08 1.09 1.10 1.11 1.12 1.13 1.14 1.15 1.16 1.17 1.18 1.19 1.20 1.21
[] Fate/complete material IV: Extra material - Fate/Apocrypha - Astolfo, p.318-319 - ↑ Jump up to: 2.00 2.01 2.02 2.03 2.04 2.05 2.06 2.07 2.08 2.09 2.10 2.11 2.12 2.13 2.14 2.15 2.16 2.17 2.18 2.19 2.20 2.21 2.22 2.23 2.24 2.25 2.26 2.27 2.28 2.29 2.30 2.31 2.32 2.33 2.34 2.35 2.36 2.37 2.38 2.39 2.40 2.41 2.42 2.43 2.44 2.45 2.46 2.47 2.48
[] Fate/Apocrypha material - STATUS: Rider of Black, p.024-025 - ↑ Jump up to: 3.00 3.01 3.02 3.03 3.04 3.05 3.06 3.07 3.08 3.09 3.10 3.11 3.12 3.13 3.14 3.15 3.16 3.17 3.18 3.19 3.20 3.21 3.22 3.23 3.24 3.25 3.26 3.27 3.28 3.29 3.30 3.31 3.32 3.33 3.34 Fate/Grand Order material III - Astolfo, p.188-197 translated by castor 212
- ↑ Jump up to: 4.00 4.01 4.02 4.03 4.04 4.05 4.06 4.07 4.08 4.09 4.10 4.11 4.12 4.13 4.14 4.15 4.16 4.17 4.18 4.19 4.20 4.21 4.22 4.23 4.24 4.25
[] Fate/Grand Order - Rider Profile [T] - ↑ Jump up to: 5.0 5.1 5.2 5.3 5.4 5.5 5.6 5.7 5.8
[] Fate/Apocrypha material - CHARACTER Profile: Rider of “Black”, p.070-073 [T] - ↑ Jump up to: 6.0 6.1 6.2 6.3 Fate/Grand Order - Astolfo's My Room voicelines.
- ↑ Jump up to: 7.0 7.1
[] Fate/Apocrypha material - Encyclopedia: Rider of “Black” [Servant], p.163-164 [T] - ↑ Jump up to: 8.0 8.1 8.2
[] Apocrypha material - Astolfo, p.008-009 [T] - ↑ Jump up to: 9.0 9.1 9.2 9.3 Fate/Grand Order material III Astolfo's Profile, translated by Beast's Lair User castor212.
- ↑ Fate/Apocrypha Epilogue: Side of Survivor
- ↑ Fate/Grand Order: Epic of Remnant - Agartha: The Mythical Subterranean Society, Section 1: Welcome by the Subterranean World
- ↑ Jump up to: 12.0 12.1 Fate/Grand Order: Epic of Remnant - Agartha: The Mythical Subterranean Society, Section 2: Contact
- ↑ Fate/Grand Order: Epic of Remnant - Agartha: The Mythical Subterranean Society, Section 3: At the Amazon Village
- ↑ Fate/Grand Order: Epic of Remnant - Agartha: The Mythical Subterranean Society, Section 4: Resistance
- ↑ Fate/Grand Order: Epic of Remnant - Agartha: The Mythical Subterranean Society, Section 5: Heading to Ys
- ↑ Jump up to: 16.0 16.1 16.2 Fate/Grand Order: Epic of Remnant - Agartha: The Mythical Subterranean Society, Section 6: The Pirate Princess Lewdly Smiles
- ↑ Fate/Grand Order: Epic of Remnant - Agartha: The Mythical Subterranean Society, Section 7: To the Nightless City
- ↑ Jump up to: 18.0 18.1 18.2 18.3 18.4 18.5 18.6 Fate/Grand Order: Epic of Remnant - Agartha: The Mythical Subterranean Society, Section 8: The Brilliant Fortress City
- ↑ Fate/Grand Order: Epic of Remnant - Agartha: The Mythical Subterranean Society, Section 9: Temporary Retreat
- ↑ Fate/Grand Order: Epic of Remnant - Agartha: The Mythical Subterranean Society, Section 10: Invading El Dorado
- ↑ Jump up to: 21.0 21.1 Fate/Grand Order: Epic of Remnant - Agartha: The Mythical Subterranean Society, Section 11: Flames of Progress
- ↑ Fate/Grand Order: Epic of Remnant - Agartha: The Mythical Subterranean Society, Section 12: Unpaintable Beauty
- ↑ Fate/Grand Order: Epic of Remnant - Agartha: The Mythical Subterranean Society, Section 13: Decisive Battle in El Dorado
- ↑ Fate/Grand Order: Epic of Remnant - Agartha: The Mythical Subterranean Society, Section 15: The Story Comes to Fruition
- ↑ Jump up to: 25.0 25.1 25.2 Fate/Grand Order: Epic of Remnant - Agartha: The Mythical Subterranean Society, Section 16: Women of Agartha
- ↑ Fate/Grand Order - Santa Alter for Roughly a Week: The Second Night: Her Name is Marie-chan
- ↑ Jump up to: 27.0 27.1 27.2 Fate/Grand Order - Fate/Apocrypha: Inheritance of Glory, Section 7: Decisive Battle : Ever-Floating Garden
- ↑ Fate/Grand Order - Fate/Apocrypha: Inheritance of Glory, Section 2: Castle Defense : Millennia Fortress
- ↑ Fate/Grand Order - Fate/Apocrypha: Inheritance of Glory, Section 4: Showdown : Twin Swords & A Cavalry
- ↑ Fate/Grand Order - Fate/Apocrypha: Inheritance of Glory, Section 5: Mr. Chiron's Combat Lessons
- ↑ Jump up to: 31.0 31.1 Fate/Grand Order - Fate/Apocrypha: Inheritance of Glory, Section 6: A Dream-like Moment
- ↑ Fate/Grand Order - Fate/Apocrypha: Inheritance of Glory, Section 8: Golden Yggdmillennia: Tree of a Thousand Realms
- ↑ Jump up to: 33.0 33.1 Fate/Grand Order - Fate/Apocrypha: Inheritance of Glory, Section 9: Thus, It Went Into Hibernation Mode
- ↑ Fate/Apocrypha Volume 2: Round Dance of Black / Festival of Red - Chapter 3
- ↑ Fate/Apocrypha Volume 1: Apocrypha: Great Holy Grail War - Chapter 1
| ||||||


