Quick Start Guide
This page is a guide aimed at helping anyone set up a cheap radio scanner based on the RTL-SDR software defined radio as fast as possible on a Windows system. If you have any trouble during the installation, please see the troubleshooting guide further down the page. We also have brief instructions for getting started on Linux and OSX at the end of this page.
Please note that the RTL-SDR is not a plug and play device. You will need to have sufficient skills to perform basic PC operations such as unzipping files, installing software, moving and copying files and have the motivation to learn new software.
******* RTL-SDR Blog V3/V4 Users *******
New RTL-SDR Blog V4 USERS: Please remember that you need to install our custom drivers in order to make the V4 work. The quickstart guides below show how to install them on common software. For other software we have generic instructions here rtl-sdr.com/V4.
We suggest the following reading order:
- Quickstart Guide: rtl-sdr.com/QSG - Current page. Helps you install the software and set up your dongle.
- V3 Features Guide: rtl-sdr.com/V3 - Learn how to use special V3 features like the direct sampling HF mode and bias tee.
V4 Features Guide: rtl-sdr.com/V4 - Learn how to use special V4 features and how to install the required drivers for V4 models. - SDR# Users Guide: rtl-sdr.com/SDRSHARP - Learn about the settings in SDR#.
- Dipole Antenna Guide: rtl-sdr.com/DIPOLE - Learn how to use your RTL-SDR Blog multipurpose dipole antenna (if purchased in set)
RTL-SDR BLOG V3/V4 BUYERS: PLEASE BE WARY OF COUNTERFEITERS. Opportunistic sellers are advertising all sorts of dongles under our brand "RTL-SDR Blog". The dongles with blue or green cases or square rectangular silver cases with four screws per panel (eight total), or those advertised as "Pro" are not ours. Those dongles use poorer quality components, are designed cheaply, and may not have all the V3 features. We cannot provide support for counterfeits and these do not help support the running of the blog and the design of new products. The best place to purchase RTL-SDR V3 dongles is directly from our store at www.rtl-sdr.com/store.

***************************************
Equipment Guide
We recommend purchasing one of our RTL-SDR Blog V3 or V4 dongles. See the Buy RTL-SDR dongles page for more information on purchasing.
Generally at least a dual core processor will be required to run most SDR software smoothly. Some command line software and ADS-B decoders may work on less powerful hardware.
To get the most enjoyment out of RTL-SDR you will need a decent antenna. Our packages that come with the dipole antenna set are a great start. Be sure to get them up high and outside (during good weather only) for best results. Units not sold by us may come with a smaller fixed length whip antenna with a magnetic mount base that is okay for testing, but overall is not that great. The recommended outdoor antenna for general scanning is a discone due to their wide band receiving properties. You can also cheaply build a wideband planar disk antenna (pdf warning) out of some metal pizza pans.
SDR# (SDRSharp) Set Up Guide (Tested on Windows 11/10/8/7) (XP/Vista Incompatible) (Works with RTL-SDR Blog V4/V3)
SDR# is the most commonly used SDR program on Windows. We recommend it as one of the easiest to setup and use with the RTL-SDR.
- Purchase an RTL-SDR dongle. We recommend purchasing one of our RTL-SDR Blog V3 or V4 dongles. Information on purchasing one can be found here.
- You must have the Microsoft .NET 8.0 x86 Desktop Runtime installed to use SDRSharp. Most modern PCs will have automatically updated to this already unless you have specifically blocked these updates on your PC.
- You will also need the Microsoft Visual C++ redistributable installed. Most PCs will have this already installed, but if you do not you can download the x86 version from here.
- Go to www.airspy.com and find the downloads button on the top menu. Next to the "Software Defined Radio Package" heading click on the download button to download sdrsharp-x86.zip. Do not download the community managed edition, as this is often broken.

- Extract (unzip) sdrsharp-x86.zip to a folder on your PC. (Important! Many people who have issues forget this step! DO NOT run the files from within the zip file or the following steps will fail). (Also, do not extract into a folder within the Program Files directory, or installation may fail as these folders are often automatically made read only by Windows).
- Double click on install-rtlsdr.bat from within the extracted folder. On some versions of Windows you may get a SmartScreen warning. Click on More Info, then Run Anyway. This will start a command prompt that will download all the drivers required to make SDRSharp work with RTL-SDR. Once completed, press any key to close the command prompt.
If the batch file ran successfully the files rtlsdr.dll and zadig.exe will be downloaded into the SDR# directory. If they were not downloaded then your PC or anti virus solution may be misconfigured and may have trouble running batch files (Check that the folder is not read only, and not located in the Program Files directory).
If install-rtlsdr.bat fails to download the dll or zadig, do a manual driver installation. If Zadig is smaller than 5000kB (5MB), the download has failed and you should download Zadig manually.

- Plug in your dongle. Do not install any of the software that it came with (if any), and ensure that you wait a few seconds for plug and play to finish attempting to install the dongle (it will either fail or install Windows DVB-T TV drivers). If you've already installed the DVB-T drivers that came on the CD bundled with some dongles, uninstall them first.
- In the folder where you extracted the sdrsharp files find the file called zadig.exe. Right click this file and select "Run as administrator".
- In Zadig, go to "Options->List All Devices" and make sure this option is checked. If you are using Windows 10 or 11, in some cases you may need to also uncheck "Ignore Hubs or Composite Parents".

- Select "Bulk-In, Interface (Interface 0)" from the drop down list. Make sure it is Interface 0 (ZERO), and not "1". Note on some PCs you may see something like RTL2832UHIDIR or RTL2832U or Blog V4 instead of the bulk in interface. This is also a valid selection. Double check that USB ID shows "0BDA 2838 00" as this indicates that the dongle is selected.
WARNING: DO NOT select anything else or you will overwrite that device's driver! DO NOT click around randomly in Zadig. If you do you are likely to overwrite your mouse, keyboard, printer, soundcard etc drivers. Many bad reviews we get are due to people clicking around randomly in Zadig, so PLEASE check what you are doing first.
- Make sure the box to the right of the arrow shows WinUSB. The box to the left of the green arrow is not important, and it may show (NONE) or (RTL...). This left hand box indicates the currently installed driver, and the box to the right the driver that will be installed after clicking Replace/Install Driver.

- Click Replace Driver. On some PC's you might get a warning that the publisher cannot be verified, but just accept it by clicking on "Install this driver software anyway". This will install the drivers necessary to run the dongle as a software defined radio.

- Open SDRSharp.dotnet8.exe and set the "Source" to 'RTL-SDR USB'. The source menu is in the top left Hamburger Menu (the three horizontal lines).

- Press the Play button
 (the right facing triangle in the top left of the program). Your RTL-SDR software radio should now be set up and ready to use! If everything has worked you should be able to start tuning to frequencies.
- Important! Don't forget to also adjust the RF gain settings by adjusting it in the Source window, in the lower left of SDR#. By default the RF gain is set at zero. A gain of zero will probably receive nothing but very strong broadcast FM - increase the gain until you start seeing other signals.
To receive HF signals below 24 MHz with an RTL-SDR Blog V3, please see our V3 users guide.

What's Next?
After getting your RTL-SDR set up with SDR# we recommend investigating the following:
- If you are using a RTL-SDR.com V3 dongle, view our V3 users guide to learn how to use the special features like HF direct sampling and the bias tee. If it is a newer V4 dongle, visit our V4 users guide.
- Read our SDR# Users Guide to learn what each setting in SDR# does. You may also want to check out the more up to date and comprehensive "SDR# Big Book" which is available on the Airspy downloads page.
- Check out all our featured articles on this blog for various RTL-SDR related projects and tutorials.
- Upgrade from the stock antenna. For optimal reception you should use an outdoor roof mounted antenna. The optimal antenna will depend on the frequency and project you are interested in, but for a general all purpose antenna we recommend a Discone or planar disk antenna (pdf).
- If you are using your RTL-SDR for HF with direct sampling mode or an upconverter then we recommended using SDR# with the special decimation drivers. This will allow you to zoom in on the small bandwidth signals used on HF without loosing resolution.
- Check out our store for various RF accessories such as filters, LNA's and antennas.
- Also check out the official list of SDRSharp plugins which can be found here and also our unofficial list of plugins which can be found here.
Troubleshooting (Click to Expand)
Alternative Software
Below are various alternatives to SDR# that we also highly recommend. The first step to all installations is installing the drivers with Zadig. Follow the Zadig guide below when setting up a new dongle if you have not already done so during the SDR# installation.
Before following the next steps, please make sure you have installed the Microsoft Visual C++ x64 redistributable. Most PCs will have this already installed, but on some fresh installs this may not be the case.
Installing Zadig drivers
- Purchase an RTL-SDR dongle. The cheapest and best for most applications is the R820T/R820T2/R860 dongle. Information on purchasing one can be found here.
- Plug in your dongle and do not install any of the software that it came with, but ensure you let plug and play finish trying to install it. If you've already installed the software drivers it came with previously, uninstall them first.
- Go to zadig.akeo.ie and download Zadig.
- In Zadig, go to Options->List All Devices and make sure this option is checked.
- Select "Bulk-In, Interface (Interface 0)" from the drop down list. Note on some PCs you may see something like RTL2832UHIDIR or RTL2832U or Blog V4 instead of the bulk in interface. This is also a valid selection. Double check that USB ID shows "0BDA 2838 00" as this indicates that the dongle is selected.
WARNING: Do not select anything else or you will overwrite that device's driver! DO NOT click around randomly on Zadig. If you do you are likely to overwrite your mouse, keyboard, printer, soundcard etc drivers.
- Make sure the box to the right of the arrow shows WinUSB. You might get a warning that the publisher cannot be verified, but just accept it by clicking on Install this driver software anyway. This will install the drivers necessary to run the dongle as a software defined radio. Note that you may need to run zadig.exe again if you move the dongle to another USB port, or want to use two or more dongles together.
SDR++ Setup Guide (Tested on Windows 7, 10, 11) (Works with RTL-SDR Blog V4/V3)
If you experience problems with SDR#, SDR++ is our second choice software that we also highly recommend.
- Follow the Zadig guide above to install the RTL-SDR drivers via Zadig.
- Head to www.sdrpp.org and click on the button to Download the latest release.
- In the "Assets" list click on "sdrpp_windows_x64.zip"

- Extract the zip file onto a folder on your PC.
- In the extracted folder, double click on "sdrpp.exe" to start the software.

- In the top left find the "Source" menu, and select "RTL-SDR" from the drop down menu.

- Click on the Play button in the top bar.
- You should begin to see the spectrum and waterfall. You can tune to a new frequency with the frequency tuner in the top bar, and within the active bandwidth by clicking on the spectrum.

- Remember to set the Gain using the slider under the Source menu on the side.

- Remember to select the correct demodulation mode for the signal you are tuned to via the "Radio" menu on the left.

HDSDR Setup Guide (Tested on Win XP and above) (Works with RTL-SDR Blog V4/V3)
- Follow the Zadig guide above to install the RTL-SDR drivers via Zadig.
- Download HDSDR from http://hdsdr.de/, using the download button at the bottom of the page.
- Use the installer you just downloaded to install HDSDR.
- Go to https://github.com/hayguen/ExtIO_RTL/releases and download the latest 2023 version of the ExtIO zip file. Open the Zip File.
- Copy the ExtIO_RTL.dll file into the HDSDR install folder which is by default set to C:\Program Files (x86)\HDSDR.
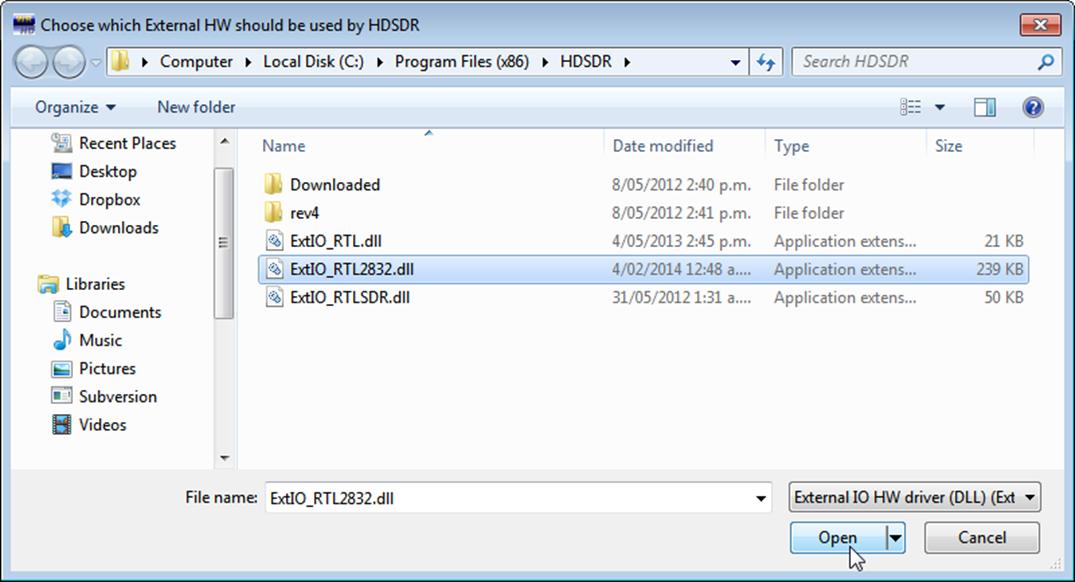
- Open HDSDR. You might be asked to select a .dll file. If it asks choose the ExtIO_RTLU.dll file you just copied over and then click Open. It is okay if you do not see this screen as long as you have copied the ExtIO_RTL.dll file over properly in the last step.
- Choose your output sound card by clicking on the Soundcard button in the bottom left corner, or alternatively by pressing F5. The only important setting here is the “RX Output (to Speaker)” setting which you should set to your speakers, or desired audio piping software.

- Click on the Bandwidth button or alternatively press F6. Choose an output Sampling Rate of 48000 Hz for general NFM signals, or choose 192000 for wideband FM signals, like broadcast FM.

- Press Start or alternatively press F2. This will start the SDR.
- To set the RTL-SDR sample rate, gain and frequency correction click on the green "SDR-Device" button.

- For the V4 make sure that "IF AGC" is NOT selected otherwise you may experience problems.
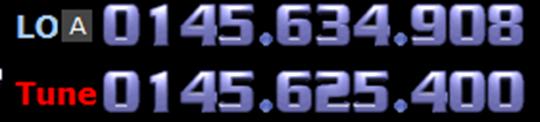
- To tune to a station, change the Local Oscillator frequency to a frequency near the frequency you are interested in. Then tune to the desired frequency either by clicking in the RF spectrum, or using the Tune numbers.
- You can zoom in and out of the spectrum by using the Zoom slider which is to the left of the word zoom.

- The mode can be altered by clicking on the mode buttons.

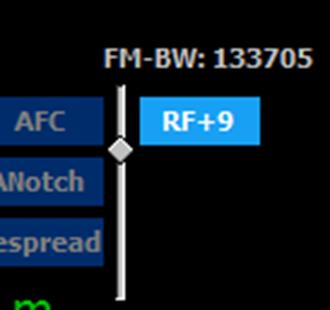
- After clicking on the FM mode button, the FM bandwidth can be manually modified with the FM-BW slider.
- To listen to a typical wideband broadcast FM station, you will need to change the audio sampling rate to 192000 Hz. Do this by clicking on the Bandwidth button or alternatively by pressing F6 and then selecting the output sampling rate as 192000 Hz.
Alternatively for HDSDR you can also use extio_rtl_tcp which will allow you to connect to an rtl_tcp server.
CubicSDR Set Up Guide (Tested on XP and above) (Works with RTL-SDR Blog V4/V3)
- Follow the Zadig guide above to install the RTL-SDR drivers via Zadig
- Go to cubicsdr.com and go to the downloads page. Find the download link for the latest version. Download the version suitable for your particular version of Windows.
- Run the CubicSDR installer.
- (V4 USERS - V3 OPTIONAL) - Download the latest RTL-SDR Blog drivers from the GitHub releases page. Open the x64 folder in Releases.zip and copy the rtlsdr.dll file into the Program Files\CubicSDR folder, replacing the old one.
- Plug in your dongle and run CubicSDR from your start menu.
- You will be greeted with a SDR Devices menu. Choose your RTL-SDR from the menu and click on the "Use Selected" button.
- CubicSDR will automatically start.
- Click anywhere on the waterfall to start listening.
Other SDR Windows Software Compatible with RTL-SDR
See the Software Guide for a big list of other compatible RTL-SDR software.
Getting Started on Linux
These are the instructions for installing the official Osmocom drivers (which now support the Blog V4). Type or copy them into the Linux terminal one at a time.
First, if you already have some other drivers installed, please purge them from your system using the following commands:
sudo apt purge ^librtlsdr
sudo rm -rvf /usr/lib/librtlsdr*
sudo rm -rvf /usr/include/rtl-sdr*
sudo rm -rvf /usr/local/lib/librtlsdr*
sudo rm -rvf /usr/local/include/rtl-sdr*
sudo rm -rvf /usr/local/include/rtl_*
sudo rm -rvf /usr/local/bin/rtl_*
Next, you can install the RTL-SDR drivers using the following.
sudo apt-get install libusb-1.0-0-dev git cmake pkg-config build-essential
git clone https://github.com/osmocom/rtl-sdr
cd rtl-sdr
mkdir build
cd build
cmake ../ -DINSTALL_UDEV_RULES=ON
make
sudo make install
sudo cp ../rtl-sdr.rules /etc/udev/rules.d/
sudo ldconfig
After installing the libraries you will likely need to unload the DVB-T drivers, which Linux uses by default. To unload them temporarily type "sudo rmmod dvb_usb_rtl28xxu" into terminal. This solution is only temporary as when you replug the dongle or restart the PC, the DVB-T drivers will be reloaded. For a permanent solution, create a text file "rtlsdr.conf" in /etc/modprobe.d and add the line "blacklist dvb_usb_rtl28xxu". You can use the one line command shown below to automatically write and create this file.
echo 'blacklist dvb_usb_rtl28xxu' | sudo tee --append /etc/modprobe.d/blacklist-dvb_usb_rtl28xxu.conf
Now you can restart your device. After it boots up again run "rtl_test" at the terminal with the RTL-SDR plugged in. It should start running.
NOTE: Some devices like the Orange Pi zero have a bug in their current mainline OSes. Instead of blacklisting "dvb_usb_rtl28xxu", you will need to blacklist "dvb_usb_rtl2832u". If you installed rtl-sdr by "apt-get", you will need to update the black list file at /etc/modprobe.d/rtl-sdr-blacklist.conf manually too.
After installing the libraries and black listing the DVB-T drivers we recommend starting off with SDR++ or GQRX. Instructions for installing SDR++ are on their GitHub, and for GQRX it can be downloaded via the package manager in your Linux distribution or from http://gqrx.dk/download. We can also recommend the multi-platform CubicSDR which can be downloaded from http://www.cubicsdr.com.
Raspberry Pi IMPORTANT NOTE
If you are running the latest Raspbian version with release date October 10th 2023, May 3rd 2023, please note that there is a kernel bug that causes the error "rtlsdr_demod_write_reg failed with -7". The fix is simple, simply run "sudo rpi-update" to update to the latest Kernel version. More information on this post.
Getting Started on Mac OSX
There are several software options that we recommend for Macs. Most software (but not all) now supports Intel and the newer ARM based CPUs. Make sure that you download the correct release for your CPU type.
SDR++ is highly recommended for use on OSX. They now have support for both Intel an ARM Mac CPUs. Simply download the latest zip for your platform on their nightly Releases page.
GQRX is also an excellent SDR program that works well on OSX. It can be downloaded via Macports and/or Homebrew, or installed directly via the dmg on their Releases page.
Another option is SDRangel. This is a powerful piece of software with many built in decoders, but it has a bit of a harder to use UI, so it is not recommended for beginners. They have both Intel and ARM support and the latest dmg can be downloaded from their Releases page.
CubicSDR is another option, but it has not been updated in a while. So it may not support the latest OS versions, or the newer ARM based Macs.
 For a comprehensive book about the RTL-SDR you may be interested in our book available on Amazon. Available in physical and eBook formats. The Hobbyist's Guide to the RTL-SDR: Really Cheap Software Defined radio. |
 wpDiscuz


Followed the steps in this guide to install and configure the RTL-SDR v3. The user guide was helpful in understanding what all the buttons were for. At first, I could not tune in any FM station, but after some checking, found the antenna wire had a short. Problem solved. Stations come in clear and strong. Nice little device. My plan is to try decoding signals from 900 MHz sensors to integrate into my smart home ecosystem using MQTT.
For Snapdragon based devices such as the SurfacePro 11 Elite, follow the instructions here: https://armsdr.com/drivers.html
I spent hours following every advice on the web before finding this resource and finally solving the problem. I hope this resource helps save someone else the trouble I went through!